DIY Wall Hanging

Hi friends!

I was feeling crafty this weekend when I came across this really pretty area rug at TJ Maxx. I’ve been looking for something to hang above the cabinets in my girls’ playroom for awhile, and while an area rug isn’t typically what I’d choose, this particular rug was so pretty! I knew I could make it awesome with a few supplies – most I had on hand.

Wall Hanging Supplies

I picked up a couple yards of pretty white fringe from Hobby Lobby and hot glued two rows onto the bottom edge of the rug. Then I placed a pre-stained dowel rod (from our wedding!) at the top of the rug and hot glued the top edge over it to create a pocket for the rod. All that was left was tying on the string and hanging it on the wall.

DIY Wall Hanging

Voila! A do-it-yourself wall hanging and super cute playroom decor. That adorable basket (also from Hobby Lobby) holds our wooden train set. I love practical toy storage that’s attractive, too!

Posted in Crafts, Playroom | Comments Off on DIY Wall Hanging

Our DIY Headboard

We’ve been without a proper bed frame since we moved to Colorado. We kept saying we’d replace the bedroom set we left in Arkansas, but buying a house will quickly drain your furniture budget! This is the bed I’d been eyeing forever, but we could never make ourselves pull the trigger.

Brompton Tufted WingbackSo our options were to wait to order a bed until it was in the budget (and who knows when that would be with another baby on the way) or make one ourselves. We decided to make just the headboard and pair it with a $20 metal bed frame and $15 white bedskirt to finish the look. We followed this tutorial by Sarah M. Dorsey pretty closely. Here’s how it all went down.

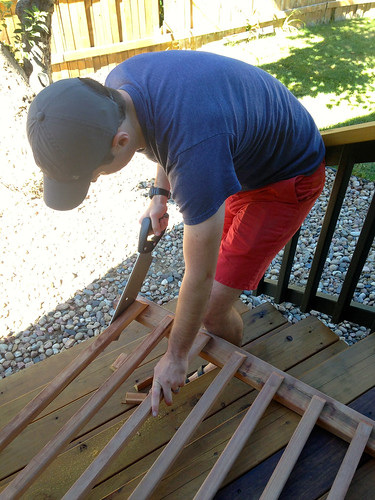
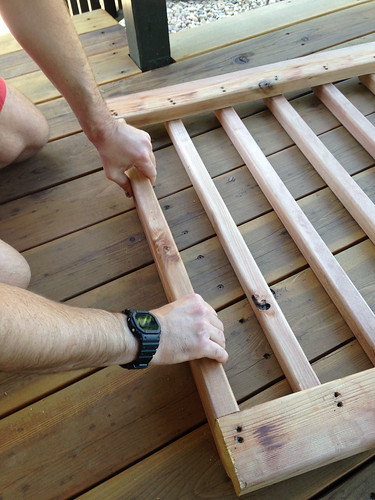
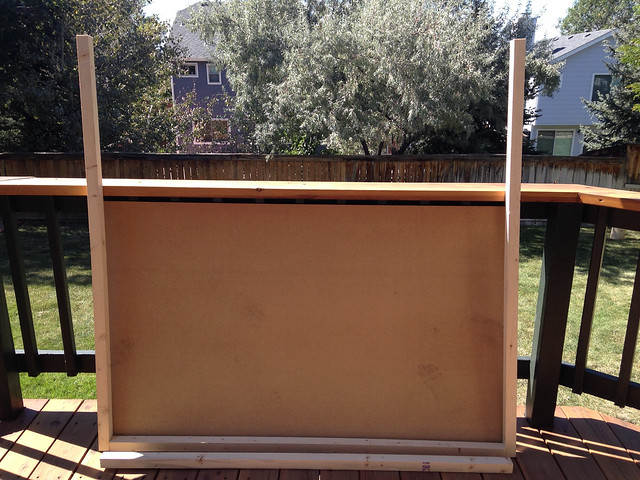
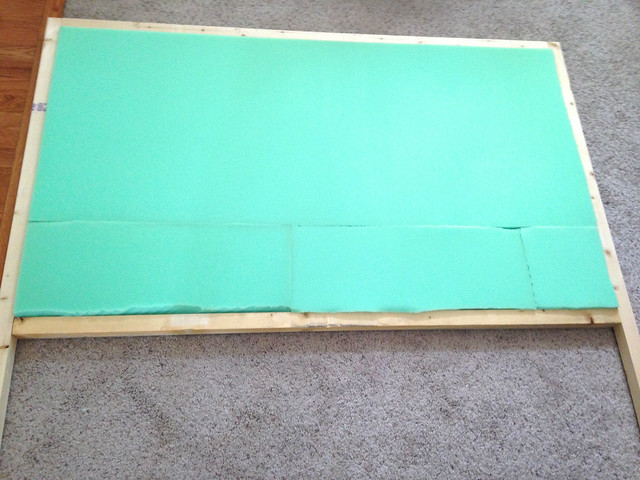
First we built the headboard frame using 1/4″ fiberboard and pine 2x2s. Our fiberboard measured 60″ x 36″.

Headboard Assembly

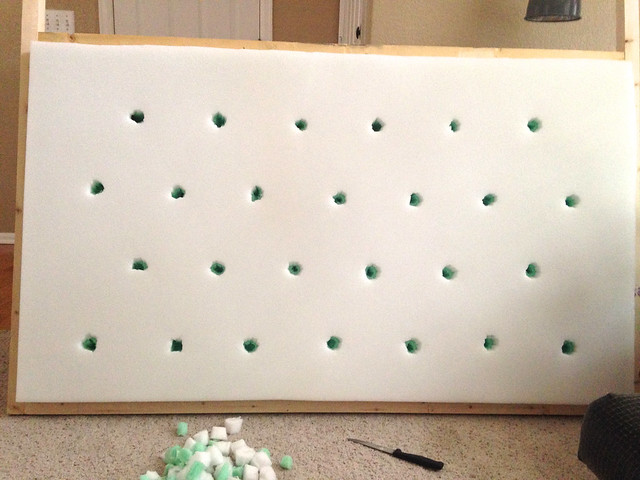
Then we measured and drilled holes for the 26 buttons. One of the most time consuming parts of this project was covering all those buttons! We used a navy blue velveteen fabric which was way too thick for the standard button kit. A combination of patience and hot glue eventually did the trick.

Button Holes Drilled

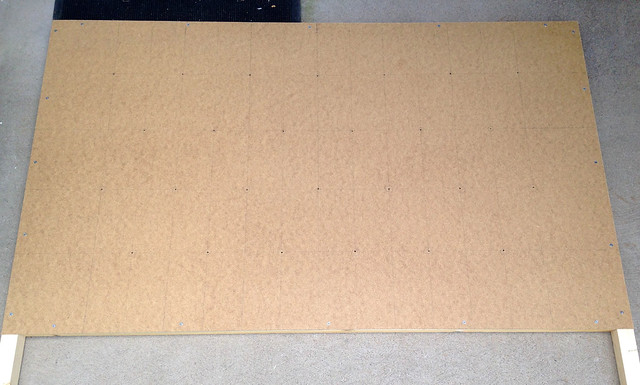
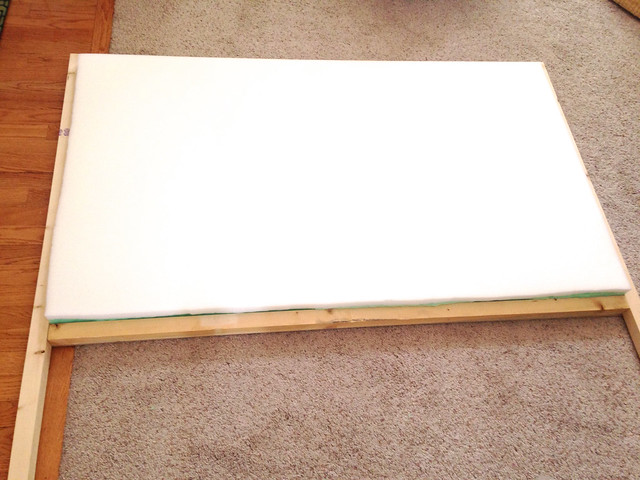
After the holes were drilled, we put down the foam.

First Layer Foam

I found this green 2″ thick foam at Joann Fabrics during a sale and the 1″ thick white foam came from Hobby Lobby. The foam was easily one of the most expensive parts of the project.

Second Layer Foam

I used a meat thermometer to poke holes in the foam from the back side and then a serrated kitchen knife to cut away the excess foam from the front.

Button Holes Cut

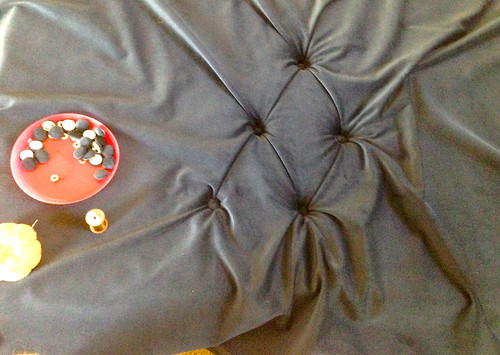
Next it was tufting time! First, let me say, this is not a one-person job. I attempted to tuft this bad boy myself one afternoon and got one button on (poorly) before giving up an hour later! You really need two people to apply enough tension to get nice deep tufts.

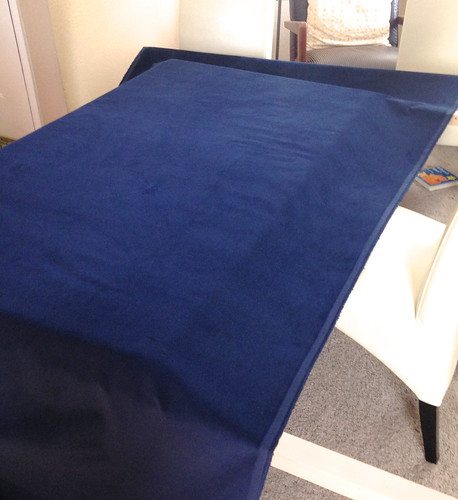
We laid the headboard across a few chairs so one person could be underneath the headboard and the other could be working on top. We put down some cotton batting and then our velvet, making sure to leave lots of extra material around the edges.

Velvet and Batting

Stephen would send a long needle (using doubled-up extra strength thread) up through the back of the headboard, through the foam, batting, and fabric, and I would thread on the button and send it back down. I’m not going to lie, getting the fabric to lay correctly and finding a good method to tie off the buttons took forever! At this point I was pretty sure this project would be a flop.

Tufting Headboard

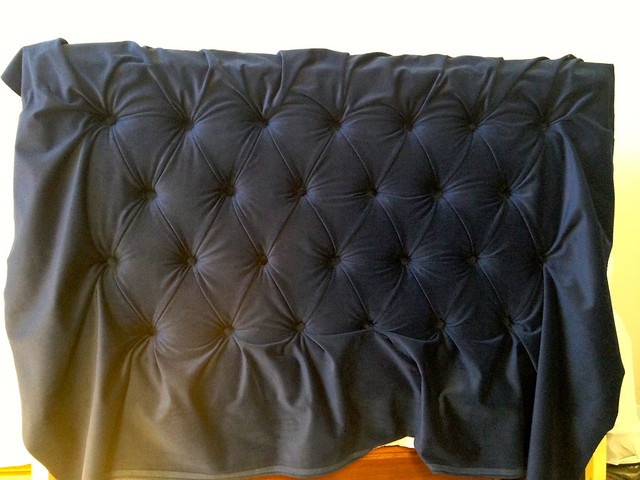
Amazingly, after several more buttons, the headboard started to look okay. We ended up using washers on the back of the headboard to tie off the thread. I would push down on the button as hard as I could so Stephen had enough slack to tie the thread. A few of our threads broke during this process, which meant we had to redo that tuft all over again. We were so glad when the last button was in place.

Headboard Tufted

Here’s a look at the back of the headboard, where you can see the washers anchoring the tufts.

Washers Securing Tufts

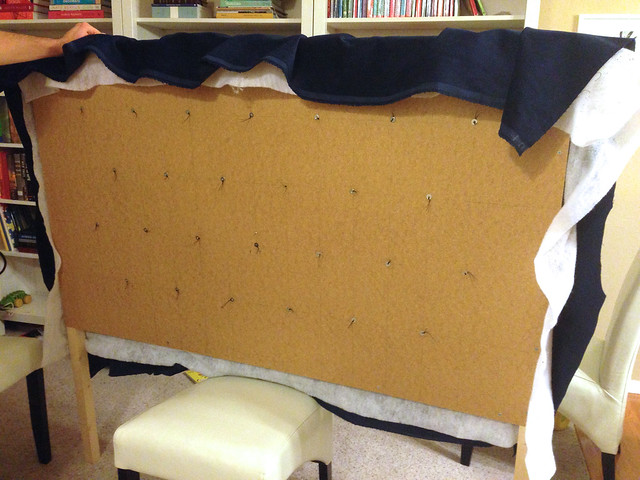
The next step was stapling the fabric to the back of the headboard, covering the legs with fabric, and adding nailhead trim. Here’s a look at the headboard pre-trim.

Headboard Minus Nailhead

I had saved the leftover brass trim strips from our first DIY headboard project, and amazingly I had more than enough for this headboard, too.

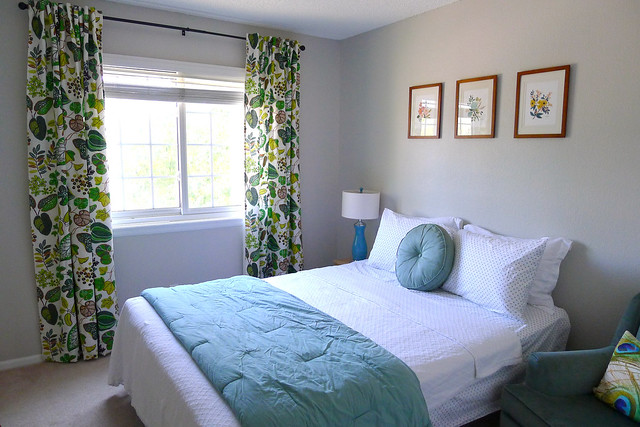
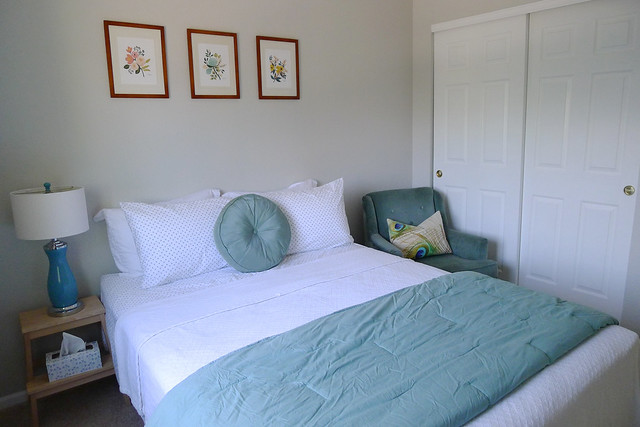
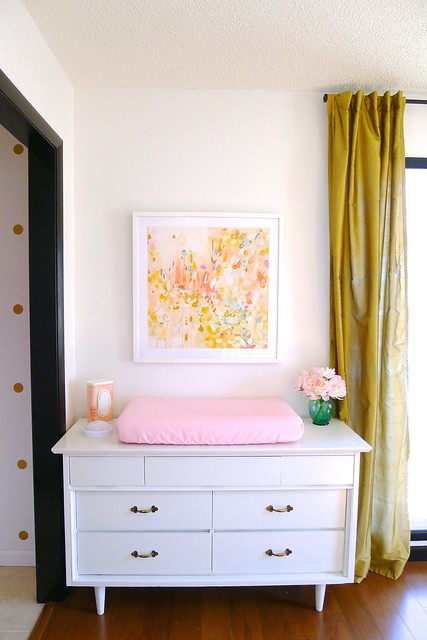
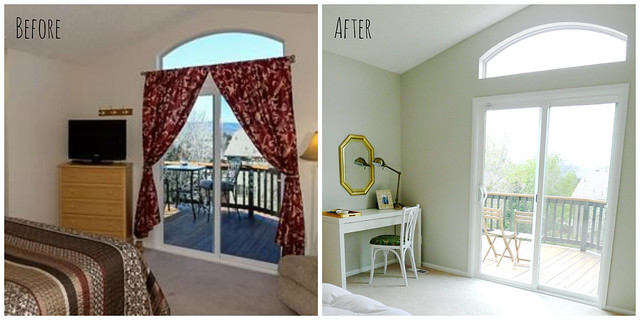
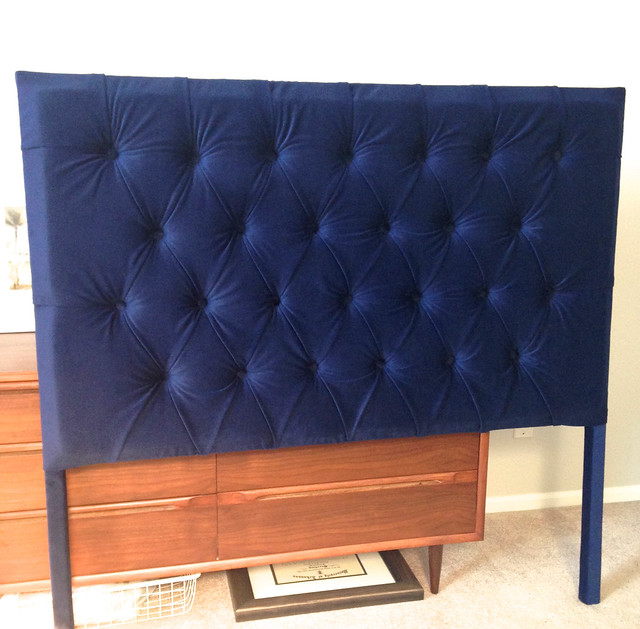
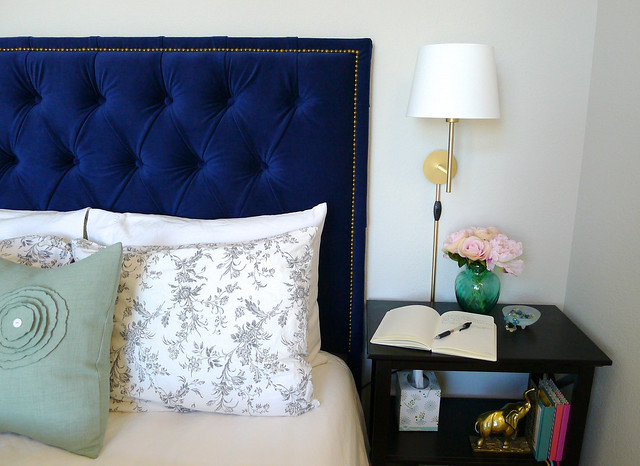
We’re working on finishing up our master bedroom, so here’s just a peek of the bed area and how the headboard turned out.

Headboard Final

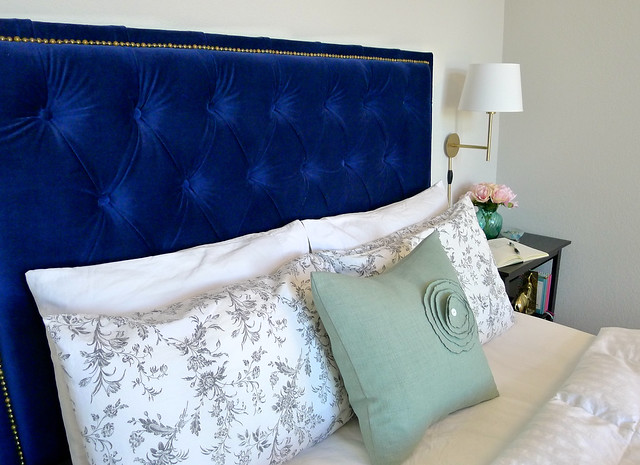
What do you think of the finished product? To say we’re happy with how it turned out would be an understatement! We LOVE our new bed!

Headboard After

As for the cost, we figure the total ended up around $150. Certainly not cheap and not much cheaper than some tufted headboards we’ve seen online. I think the project was worth it since we got exactly the headboard we wanted, but based on the hours we spent on it, I’m not sure we’ll tackle another one of these any time soon!

I’m working on a before and after post for our master bedroom. Hopefully it won’t be too long before that post goes up, but since today is my due date with baby girl #2, no guarantees! Thanks for reading. 🙂

Posted in master bedroom, tutorial | Comments Off on Our DIY Headboard

A Nursery for Baby C

Well here we are, officially two weeks until baby girl two is due! Nesting has kicked in full force. As a matter of fact, the very day our last holiday guests left, we had the queen bed out of the guest room and the new crib up within a few hours. As a reminder, here’s how the room looked most recently.

Guest Room After

Here’s the same view today!

Crib and Rocker Wall

We went with a decidedly floral theme in this room with lots of pink and dark green. The view of the opposite wall is my favorite!

Changing Table + Shelves

We’d used that 3-drawer dresser in our closet and guest room at our previous house and in our master bedroom in this house before discovering it was the perfect size for a changing pad. I love that it is petite and keeps this small room from feeling too cramped. I scored the pink flower lamp for free from a local garage sale site. It will be perfect for middle-of-the-night diaper changes.

Changing Station

Based on the monogram above the dresser, you can guess we’ve chosen a name. We’re waiting to share the name publicly until after Baby C arrives, but I think this floral letter (a DIY from cardboard, hot glue, and $30 worth of faux flowers) might be one of my favorite projects ever!

Floral Monogram

The prints on the opposite wall are from Rifle Paper Co. and blanket (in perfectly coordinating colors) was a handmade gift from my mom. The crib was an awesome craigslist find and came with a like-new mattress. Funny how I never would have considered a used crib when I was pregnant with our first baby, but this room is furnished with completely second-hand items!

Crib and Blanket

The floating shelves (from CB2) made the move with us from our Arkansas guest bedroom. I love them so much more in this nursery, and they are practical as well as pretty. Since the dresser only had room on top for the changing pad, we decided to install the shelves within reach to house wipes, diaper creams, and little accessories (like socks and bows), along with decor.

Floating Shelves

The owl on the top shelf was a handmade gift – isn’t it so adorable? The print is by Jones Design Co, and the pink frame was a shower gift we received for our first little lady. I just swapped out the photo for our 16 week ultrasound of Baby C.

Upper Shelf Closeup

I especially like this little setup on the middle shelf. The photo was from our family photo/maternity session this fall, and the watercolor is actually an original by big sister for her little sis! Isn’t that sweet?

Watercolor Closeup

So that’s the quick tour of the second nursery at our house. We are all eagerly awaiting Baby C’s arrival and hope she loves the room as much as we do!

Changing Table + Shelves

Posted in Babies, Before and After, C's Nursery | Comments Off on A Nursery for Baby C

It’s a Nursery, no it’s a Guest Room, no it’s a …

Almost as soon as we’d started working on the new nursery, we decided to put the brakes on that plan and keep our guest room a little longer. We have so many visitors coming between now and when baby number two arrives that it made sense to purchase a queen bed for the room (which will eventually have a home in a guest room in the basement) and put a little effort into making the room comfortable for our visitors.

When we moved in, this room was an empty green box…

Guest Room Before1Which we painted and spruced a bit for visitors over Memorial Day. Guest Room During1

The first of our fall visitors arrived last week, so we scurried around beforehand and pulled together a nicer guest room. Here’s the room now with the addition of new curtains (which will stay when this becomes the baby’s room), a new bed and bedding, a secondhand chair, and art.

Guest Room AfterGuest Room After2

We found the turquoise chair at a random yard sale one Saturday for $5. It was missing the center button, which I replaced by stealing a swatch of fabric from the underside of the chair skirt and using it to cover a new button. I’m particularly excited about this chair because I want to convert it to a rocker when this room becomes the nursery.

Guest Room ChairI fell in love with these prints from Rifle Paper Co and was so happy when they arrived for this room. I hung them a bit high to account for guests sitting up in bed, but they will also be staying on this wall when the guest room becomes a nursery… Guest Room Art

Because… It’s a GIRL!

Yep, we’re having another baby girl and we couldn’t be more excited! Some of you may remember when we announced we were expecting Libby (funny photo alert!). This time around we shared this photo series with the caption “A three year tradition of picking pumpkins and growing baby girls!”

Pumpkins 2013-15

So that’s the news from Heardmont. Our second nursery is staying a guest room for the time being, but we’re looking forward to turning it into a proper baby girl’s room by January!

Posted in Before and After, guest/craft room, Second Nursery | Comments Off on It’s a Nursery, no it’s a Guest Room, no it’s a …

Libby’s Nursery Reveal

All of my DIY projects for Libby’s room finally came together, and today I’m back to share her finished nursery! Here’s how her room looked the day we bought our house.

Libby's Room Before
Libby's Closet Wall Before

This is the only photo I’ve found of how the room looked once we moved in. We basically brought in her crib, dresser, two chairs, and curtains and that was it. No art, no paint, just the bare necessities. The yellow and blue walls with the gold curtains and pink accessories drove me nuts, but it took a few months for Stephen and I to tackle painting.

Libby's Room Just Moved InFinally, here’s how her room looks today!

Libby's Room Left Side

Libby's Room Right SideThe Michelle Armas painting above the dresser was the inspiration for the color scheme of the room. Dresser Wall

Once the walls were gray, I decided to swap out the dark gold curtains with a champagne pair I’ve had forever.

Left CornerI added blackout lining and about 12 inches of fabric (leftover from recovering the mint gingham chairs) to make them long enough. Luckily we didn’t have to purchase new window hardware. I just spray painted the existing rod gold!

Art Corner

All of the art pieces in her room traveled with us from Arkansas except the bird painting, which was a treasure we found at the beach last year. It’s so nice to finally get art out of the basement and up on the walls.

DIY Chair Pillow Curtains

The bird pillow was another DIY project. I found this fabric when I was looking for upholstery material for the slipper chairs and fell in love.

DIY Bird Pillow

The reverse side of the pillow is the mint gingham fabric, and I found tiny pink pom pom trim at Hobby Lobby for the edges. Isn’t it adorable?

Reupholstered Chairs

Even though the room is small, I really wanted to have a pair of chairs in there so both parents would have a place to sit for bedtime. Luckily there was just enough room for an old end table of ours between the two chairs. It serves as a surface for our little owl lamp and storage for small toys and bedtime stories.

Book Nightstand

Above the crib, we hung a shadowbox with a collection of starfish my grandma found at the beach decades ago, a paper heart Stephen made for our first wedding anniversary, and a print I gave him that says “Home is wherever I’m with you.”

Crib Wall

This wall is also home to our DIY guitar shelf (the guitar dates back to the early days of our relationship). It’s fun to swap out the stuffed animals who get to sit on it – today it was pink bunny’s turn!

Guitar Shelf

Here’s another look at the crib with our new chandelier peeking out above it.

Crib and Chandy

Speaking of which, how cute is that chandelier?? I was so excited when a local mom posted it for sale on facebook. It’s from Pottery Barn and no longer available, but I was able to get it for 20% of the original price and I think it MAKES the room!

Libby's Chandelier

The gold-trimmed closet doors don’t look so out of place with the new color scheme, and Libby loves the mirrors. I don’t know how many dozens of pictures I have of her dancing or making faces at herself in those mirrors! I have a feeling she’ll appreciate them as she gets older and starts picking out her own clothes, too.

Closet Wall

So there’s a peek at our little girl’s room. I’m so happy with how it came together! What do you think?

Libby's Room Left Side

Posted in Before and After, Libby's Nursery | Comments Off on Libby’s Nursery Reveal

Two New Nurseries

Today is a big day here at Heardmont. It’s my birthday, and I’m officially leaving one decade for another!

As part of my present this year, I got the green light to decorate two rooms in our house, Libby’s nursery and … another nursery! That’s right, we’re expecting the second little bedroom at our new place to officially be occupied in January or February of next year.

I’m almost 20 weeks along, and here’s how things are looking lately.

18 weeksProgress at our new house had been slow until recently, but I’m finally feeling better and getting the urge to finish some projects before baby #2 shows up. If you’ll recall, Libby’s room looked something like this when we moved in. Nursery BeforeHere’s a progress shot from Labor Day weekend. We rolled a fresh coat of white on the ceiling and two coats of Silver Drop by Behr on the walls. Libby's Room Painted

The guest bedroom/future second nursery was actually the first room we painted. You might remember from this post that it went from this:

Guest Room BeforeTo this: Guest Room During1

It’s been fun working on both rooms at the same time! Amazingly we’re going two completely different directions for such similar starting points. The inspiration for Libby’s room is this Michelle Armas piece that hung in her nursery back in Arkansas. Changing TableWe’ll keep her dresser and crib (she won’t be ready for a big kid bed before the new baby arrives), and I’m working on some sewing projects for the rest of the room. First up, recovering one or both (we have a pair) of these slipper chairs. Here’s the first chair before: Slipper Chair BeforeAnd here it is now! Slipper Chair AfterThe new fabric is a mint gingham upholstery fabric I found at a local fabric store on clearance. It only cost about $15 to recover this bad boy! In the new nursery, I found this pair of curtains and the rest of the room design sort of took off from there. Syssan CurtainsWe’re 99% sure we know baby #2’s gender, but that will be confirmed in October. Until then, we’ll focus on getting Libby’s room ready. Hopefully soon I’ll have a few more sneak peeks to share! Stay tuned…

Posted in Before and After, Libby's Nursery, Second Nursery | Comments Off on Two New Nurseries

Quick Baby Shower Gift – Burp Cloths

Hi all! I hope your Labor Day weekend was relaxing or productive, or both! Ours was a good mix of the two, and I’m happy to say I should have some projects to share soon.

Before Libby was born, one of the items I felt we were missing in baby prep was enough burp cloths. After some pinning and googling, I came up with a quick tutorial for burp cloths which I shared here. Those puppies got a ton of use in the first six months!

Easy Burp ClothsKnowing that one can never have too many burp cloths, I recently made another set, this time for a friend having a baby boy. My favorite part about this project (aside from how quickly it came together) was picking out the fabrics!

Burp Cloths in Progress

I purchased 1/3 yard of each pattern, 2/3 of turquoise flannel and 1/3 of white flannel, which was enough for six burp cloths. Aren’t those cottons cute? Baby Boy Fabrics

Here’s the finished product, all wrapped up and ready to gift. Quick, easy, and handmade: my kind of baby gift! Finished Burp Cloths

Posted in Babies, Crafts | Comments Off on Quick Baby Shower Gift – Burp Cloths

Semi-Homemade Outdoor Baby Gate

Hi all! I’m back to share an outdoor project Stephen and I tackled a few weekends ago during Libby’s nap time. We love the deck at our new house, but were always hesitant to spend time there when Libby was awake because of this wide set of stairs that lead down to the yard.

Deck Stairs no Gate

Our toddler tends to make a beeline for those stairs but hasn’t quite mastered them yet. We decided it was time to make a baby gate for the deck so we could enjoy this space as a family. On a trip to Home Depot, we came across these pre-made fence sections. One was all we needed, and it was almost exactly the same style as our existing deck railing.   Pre-Built Railing

We also picked up two extra 2×2 slats for reinforcement, wood screws, a pack of four corner braces, two heavy duty black hinges, a black gate latch, and a caster wheel.

Additional Gate SuppliesThe first step was to cut down one side of the fence right up to the first vertical slat.

Removing Excess

Then Stephen cut and fit one of the extra 2×2 slats to reinforce this end of the gate. Fitting Reinforcement

Then we drilled pilot holes and screwed this new 2×2 into the gate and added corner braces to the top and bottom corners for more stability.

Corner Braces InstalledEnd Reinforced

Next we attached the hinges to the deck and the gate and marked gate for length while it was in place.

Gate HingesLeveling Gate

The width we needed didn’t land on a vertical slat, so we cut the gate to length and then reattached a slat at the very end. This slat was reinforced with another 2×2 like the slat on the other end of the gate.

The last steps were adding the caster wheel (so the gate can easily swing/roll open) and latch.

Gate Caster Wheel Gate Latch

And that’s how, in the course of one nap, we added a baby gate to our deck!

Finished Baby GateWe plan to paint or stain the gate to match the rest of the deck (although it’s pretty close in color already), but we have to wait for the cured wood to weather a bit before painting it. When Libby woke up from her nap, we tested it out. She didn’t necessarily like the new addition, but I’d say that’s some successful baby proofing! Baby Proof!

What do you think of our new gate?

Deck Stairs with Gate

Posted in Babies, building, tutorial | Comments Off on Semi-Homemade Outdoor Baby Gate

Quick Baby Shower Gift – Tummy Time Quilt

A great family we met when we moved to Colorado is expecting their second baby boy in September. For the baby shower, I knew I wanted to give something handmade. I was browsing in Hobby Lobby when I came across this pre-quilted navy and white stripe fabric.

Quilt FabricThe front was a cotton stripe with navy fleece on the back. I love quilts that aren’t too precious – ones you don’t feel bad about tossing on the floor for tummy time – and this material just begged to be made into that kind of quilt.

Adding Trim

I grabbed 1 1/2 yards of fabric and some gray quilt binding and got to work. Pinning the binding to the edge of the quilt took longer than anything else! Here’s how it turned out.

Baby Boy QuiltI think second babies sometimes miss out on all the special handmade goodies first babies get, so I added this baby’s initials with some teal embroidery thread. Now there will be no question whose quilt this is!

Baby Boy Quilt with Initials The quilt was a hit at the baby shower, and it was so simple to make. I’ll be keeping this project in mind for the next baby shower that comes along!

Posted in Babies, Crafts | Comments Off on Quick Baby Shower Gift – Tummy Time Quilt

Master Bedroom Progress

We’ve succeeded in painting another room! After the gray fiasco which led to a quick makeover for our guest room, we chose Silver Drop by Behr and got to work painting our master bedroom.

Gray Master Bedroom

If you recall, this room featured two-toned maroon and cream walls before we got out the paint brushes. The headboard wall took about four coats of paint to cover that red!

Master Bed2 Before

Master Bed Before

Several visitors have commented that our bedroom feels like a treehouse; it gets great natural light, is surrounded by greenery, and really is the highest room in our house.  We wanted to accentuate that feeling by making it light and bright with the view taking center stage. We love how the new color just fades into the background.

You might have also noticed our old entry table has a new life as a vanity in this corner of the room.

Vanity Area

I picked up that mirror recently at Goodwill and gave it a quick coat of gold spray paint. Much better than the before, no?

Mirror Before

We sold our old bedroom furniture before we moved, so we’re still on the hunt for the perfect bed. Once we find it, we’ll share the other side of the room. For now, here’s the side by side of our updates so far!

Master Bedroom Before and After

What do you think of the new color?

Posted in Before and After, master bedroom | Comments Off on Master Bedroom Progress