
We moved into our first home (lovingly nicknamed Heardmont) about seven years ago and immediately began snapping before pictures. In the six years we owned the house, we tore down walls, scraped popcorn ceilings, painted practically every surface and really made the place our own. Check out the before and after photos below.
Entryway Before: The first thing you saw when you walked into our 1980s entryway was wood, wood, and more wood trim. This photo shows our entryway after we’d scraped the popcorn ceilings, changed out our door hardware, added a storage ottoman and mirror, and painted the previously off-white walls a light gray.

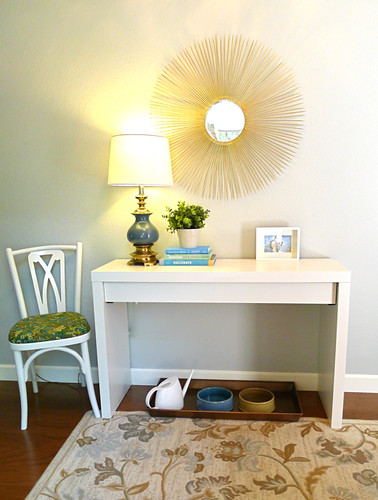
Entryway After: We primed and painted the trim white and added the DIY sunburst mirror and white console table. The new wood floors and baseboards really brought the room up to date.

Living Room Before: The day we moved in, our living room was big, empty and dated. And did I mention BIG? The dark brick fireplace was overpowering and the off-white walls went on for miles.

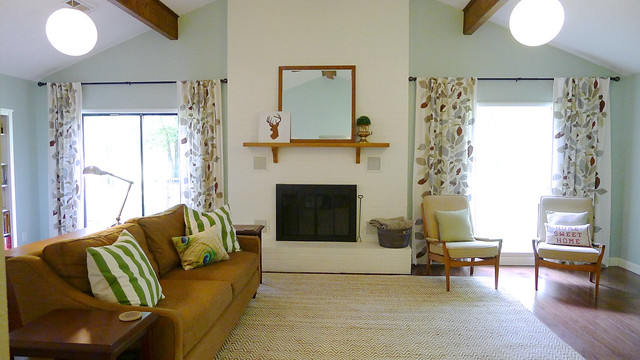
Living Room After: We started by painting the walls and that massive fireplace and then tackled the fun parts! New window treatments and furniture helped this room come a long way from cavernous to cozy.
Dining Room Before: Before Heardmont was even ours, we had big plans to turn this little box of a dining room into an open space for entertaining in style. Like the rest of the house, this room featured popcorn ceilings and wood trim. Although we appreciated the upgraded chandelier (who KNOWS what used to hang there), it wasn’t our style.


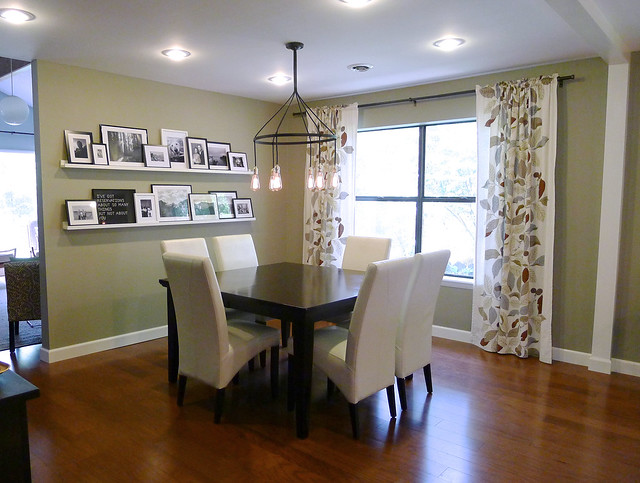
Dining Room After: The day we moved in, we tore out the wall between our dining room and kitchen. We scraped the popcorn ceiling, painted the walls and trim, and hung a new light fixture almost immediately. We updated our dining room even more by installing can lights and built a beam to disguise the missing wall between our dining room and kitchen.
Kitchen Before: Novice DIYers that we were when we bought our home, Stephen and I thought updating this dark kitchen would be a snap. As you can see, we had a lot to do, and we started with cabinet painting and (more) popcorn ceiling-scraping.

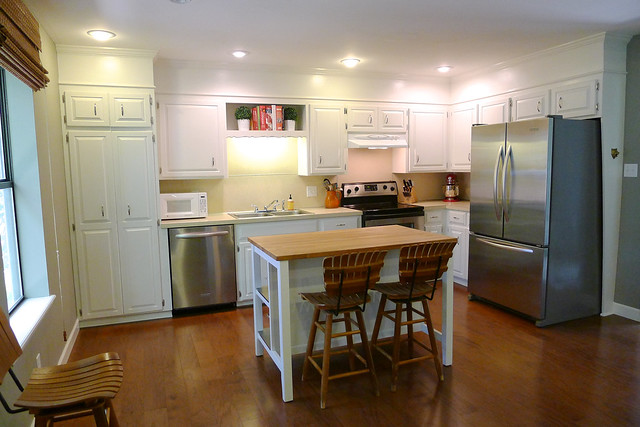
Kitchen After: Those cabinets took longer to paint than we’d like to admit. Along the way, Stephen changed out the fluorescent fixture for recessed lighting, and we replaced some appliances and added a new island.
We also extended our kitchen cabinets with crown molding and paint and removed some cabinet doors for a cute little cookbook shelf.
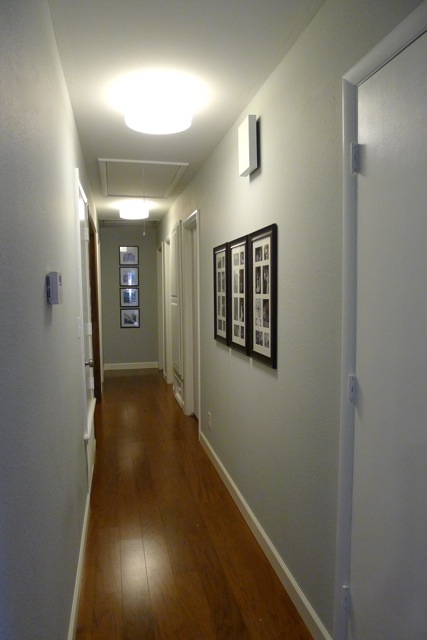
Hallway Before: A neighbor who toured our home when it was up for sale told us that her immediate memory of our house was the LONG, DARK hallway. So many wood doors, dim light, and dingy paint and carpet!

Hallway After: Our hallway saw a little love in our first couple years of owning Heardmont. We scraped the ceiling, painted the walls, and changed light fixtures. Later down the line, I finally worked up the courage to paint those miles and miles of wood trim.
Laundry Closet Before: On the left side of our hallway is our laundry closet, and that’s just what it is – a closet. Since our house was built before front-loading washers and dryers were common, the bi-fold doors wouldn’t even close when we moved our front-loaders in.

Laundry Closet After: We added shelves for storage with wooden roman shades in front and a countertop across the washer and dryer for laundry folding. Up until our master closet makeover, this was my favorite closet in the house!

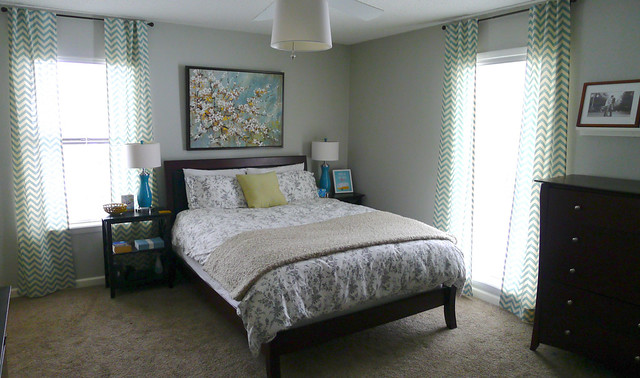
Master Bedroom Before: Two kids one year out of school don’t necessarily have the funds or the furniture to make a master bedroom shine. We bought our bedroom suite on a whim at a discount furniture store, and have been pleasantly surprised at the quality over the past few years. The rest of our master bedroom was a mix of hand-me-down furniture and bedding.

Master Bedroom After: New paint, new carpet, nightstands, curtains, and bedding – whew! We had a lot to find for our little room, but our favorite finds by far were the vintage mirror and Michelle Armas art.

After we snagged the gold curtains and art for the nursery, I sewed some quick curtains and brought more blue into the room.
Master Bathroom Before: This master bath was bland and beige when we moved in. We tackled the popcorn ceilings first, but after 3 years of boring, we were ready for a change.

Master Bathroom After: We started by adding board and batten to the walls, and the reno took off from there! For less than $600 we completely updated our master bathroom, top to bottom. The list of projects in this room is long and includes the board and batten, new lighting, a painted vanity and new sink, and our DIY shower curtain.


Master Closet Before: You probably remember our stories of leaking washing machines and flooded closets. After a required ripping out of the carpet, we laid tile and painted walls to clean up our master closet.

Master Closet After: The updates to this space were far from over, though. For around $100, we were able to add lots of fun and style to this room.

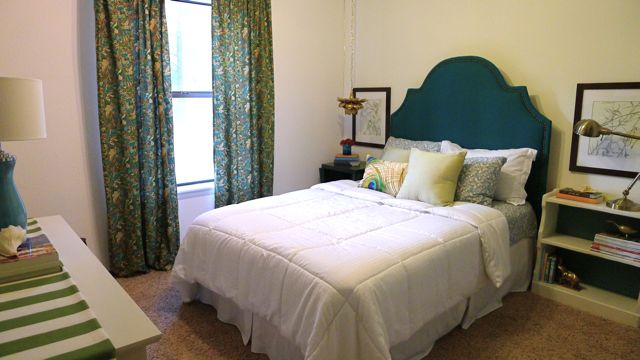
Guest Bedroom Before: For the first six months in our home, the guest bedroom served as Wedding Storage Room Extraordinaire. After our November 2008 wedding, it got the same “whatever works” treatment as our master bedroom.

Guest Bedroom After: Since we use this room primarily for guests and craft storage, we decided to give it a real makeover. I made a set of DIY drapes, a new headboard, and added more storage to the room. Check out all the projects from our guest room makeover here.
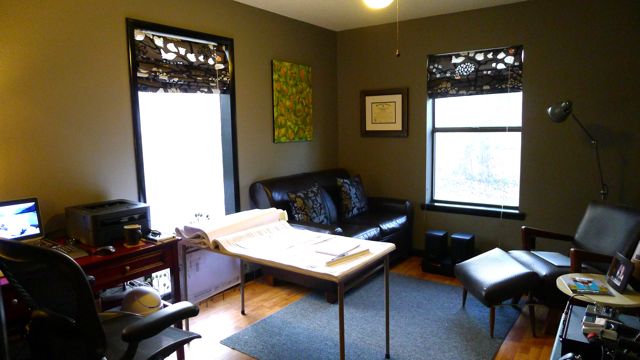
Office/Nursery Before: The third bedroom, which is actually bigger than the guest room, once served as Stephen’s office and then became our nursery. We added the couch in this room early on, and after seeing our hallway, you can guess what a feat that was!

Office After: Amazingly enough we were able to get that couch out of the office without tearing up the hallway. With the addition of a loveseat and chair, new window treatments, and an L-shaped work area, the new office really worked for Mr. Heard.
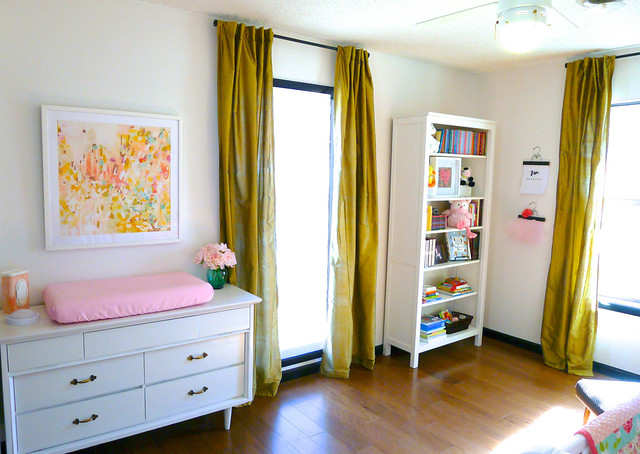
Nursery After: We had such fun decorating this room for our little girl. Check out the reveal here.
Guest Bathroom Before: Can you say Builder Boring? This room tied with the kitchen and dining room for First Room Tackled at Heardmont. Those off-white walls didn’t last more than a month after we moved in.

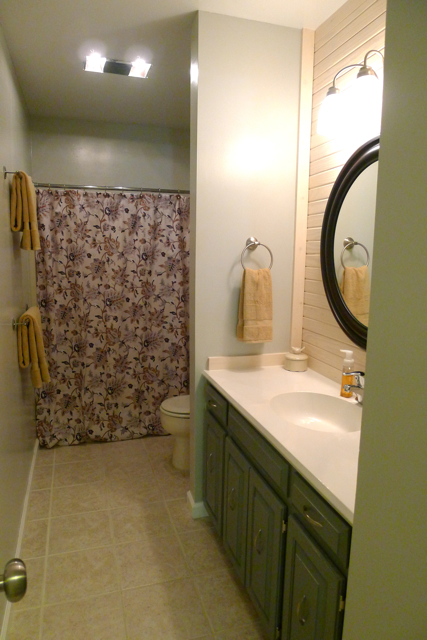
Guest Bathroom After: We just finished up this renovation, which started with more popcorn ceiling-scraping and ended with white-washed horizontal paneling, a new mirror and lighting, and lots of new linens!
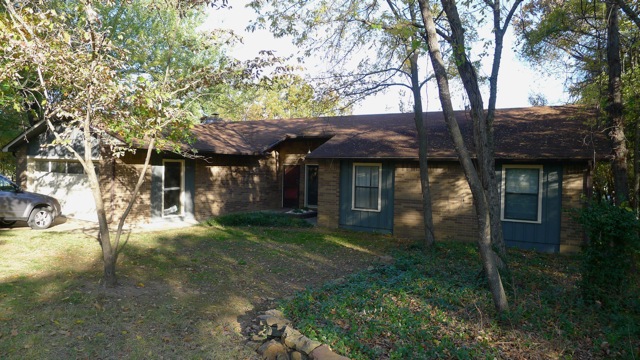
Exterior Before: Our house sported brown brick and cream paint when we bought it, and one bad paint decision later, we had this brown and navy mess on our hands.
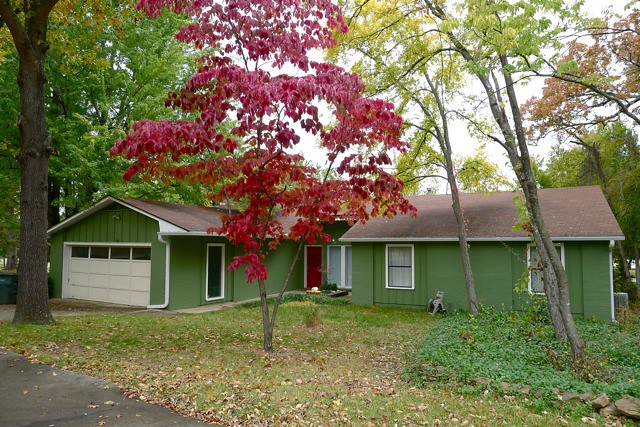
Exterior After: We painted the house a not-so-serious shade of green (Sherwin Williams Artichoke) with fresh white trim and gutters. After cleaning up the landscaping, guests could actually see our front door!
I hope you’ve enjoyed our little home tour. Let us know if you have any questions about any of the specific items or paint colors you saw on our tour, and check out Our New House tour for more before and after photos!
